When talking about 3D data we often think about high end fancy visualizations that give that wow factor where you can barely tell the difference between what is real and what is digital.
In the spatial sciences industry we are not normally concerned with the Ultra High Definition graphics, Ray Tracing, and photorealistic texturing; normally we settle for much less because we only need the basics for analysis.
ESRI’s ArcPro is a well-established industry standard when it comes to spatial analytics. It has strong vector and raster capabilities but ESRI is making strides to strengthen its 3D capability. So you want to use some nifty 3D data, but how do you get to that point of being able to do analysis? This blog will step through some of the basics when it comes to using 3D data in ArcPro.

Step 1 Import your .las file into Arc Pro
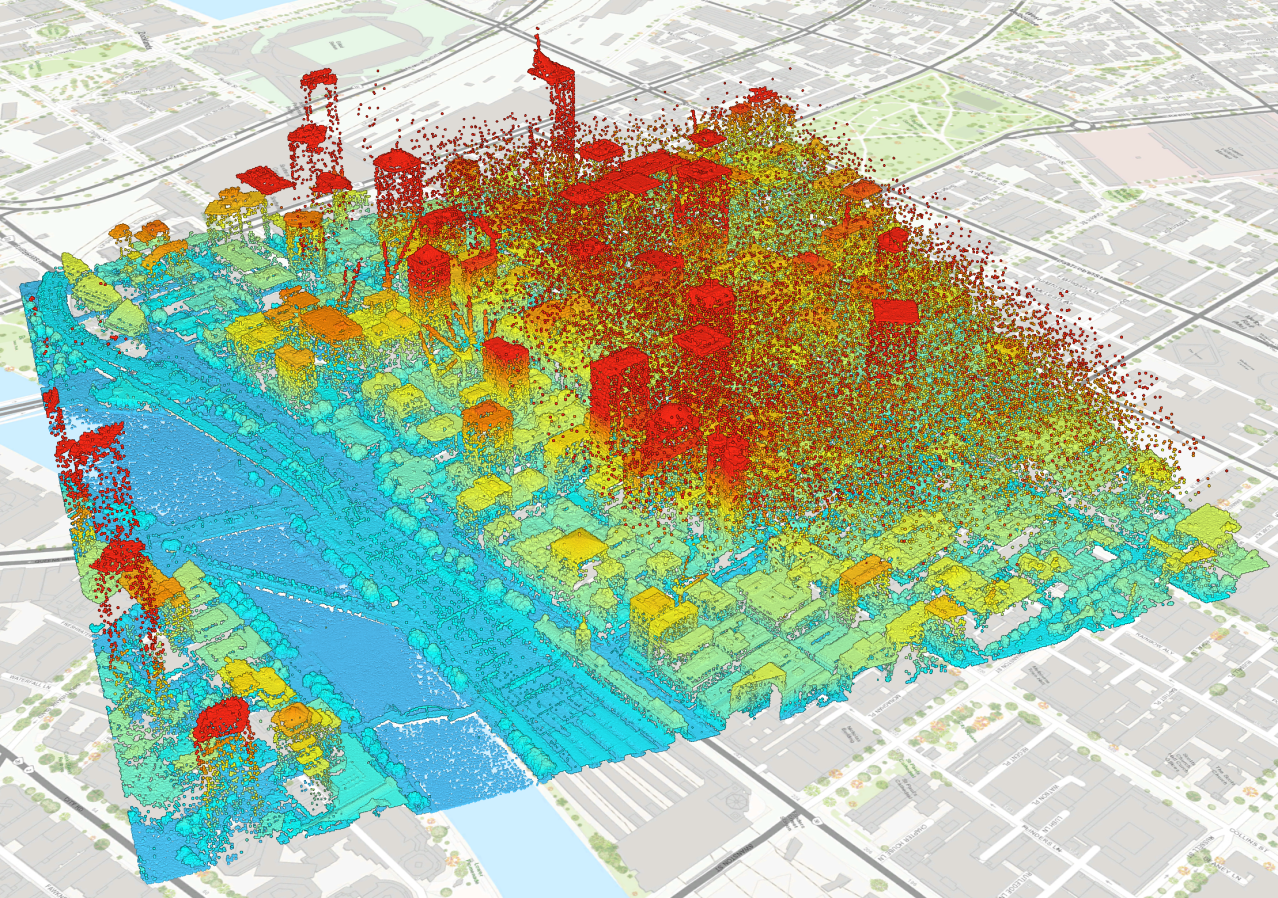
Like most 3D data, it starts off in the raw form most commonly as a LiDAR point cloud. In this example we used a raw .las tile of Melbourne’s CBD. Note how the data looks somewhat messy; this is due to there being errors present in the dataset. The first thing to do is to clean up the dataset.
Unfortunately this is immediately where ArcPro starts to fall behind. ArcPro is not a native LiDAR focused tool. As a result, when it comes to cleaning las datasets or filtering and splitting las data, it doesn’t quite meat the benchmark of other niche programs.
Step 2 Import the .las file into cloud compare
Because of this, we decided to use an additional program to prepare and clean up the dataset, called Cloud Compare which is free and open source. Cloud Compare has all the basic necessities for point cloud filtering and manipulation that we need. Using the program we were able to isolate the problematic points based upon their metadata.
The usefulness of Cloud Compare is that it creates temporary layers whenever you run a process which means it is not affecting your master dataset and instead gives you the opportunity to save out your edited cloud as a new file.
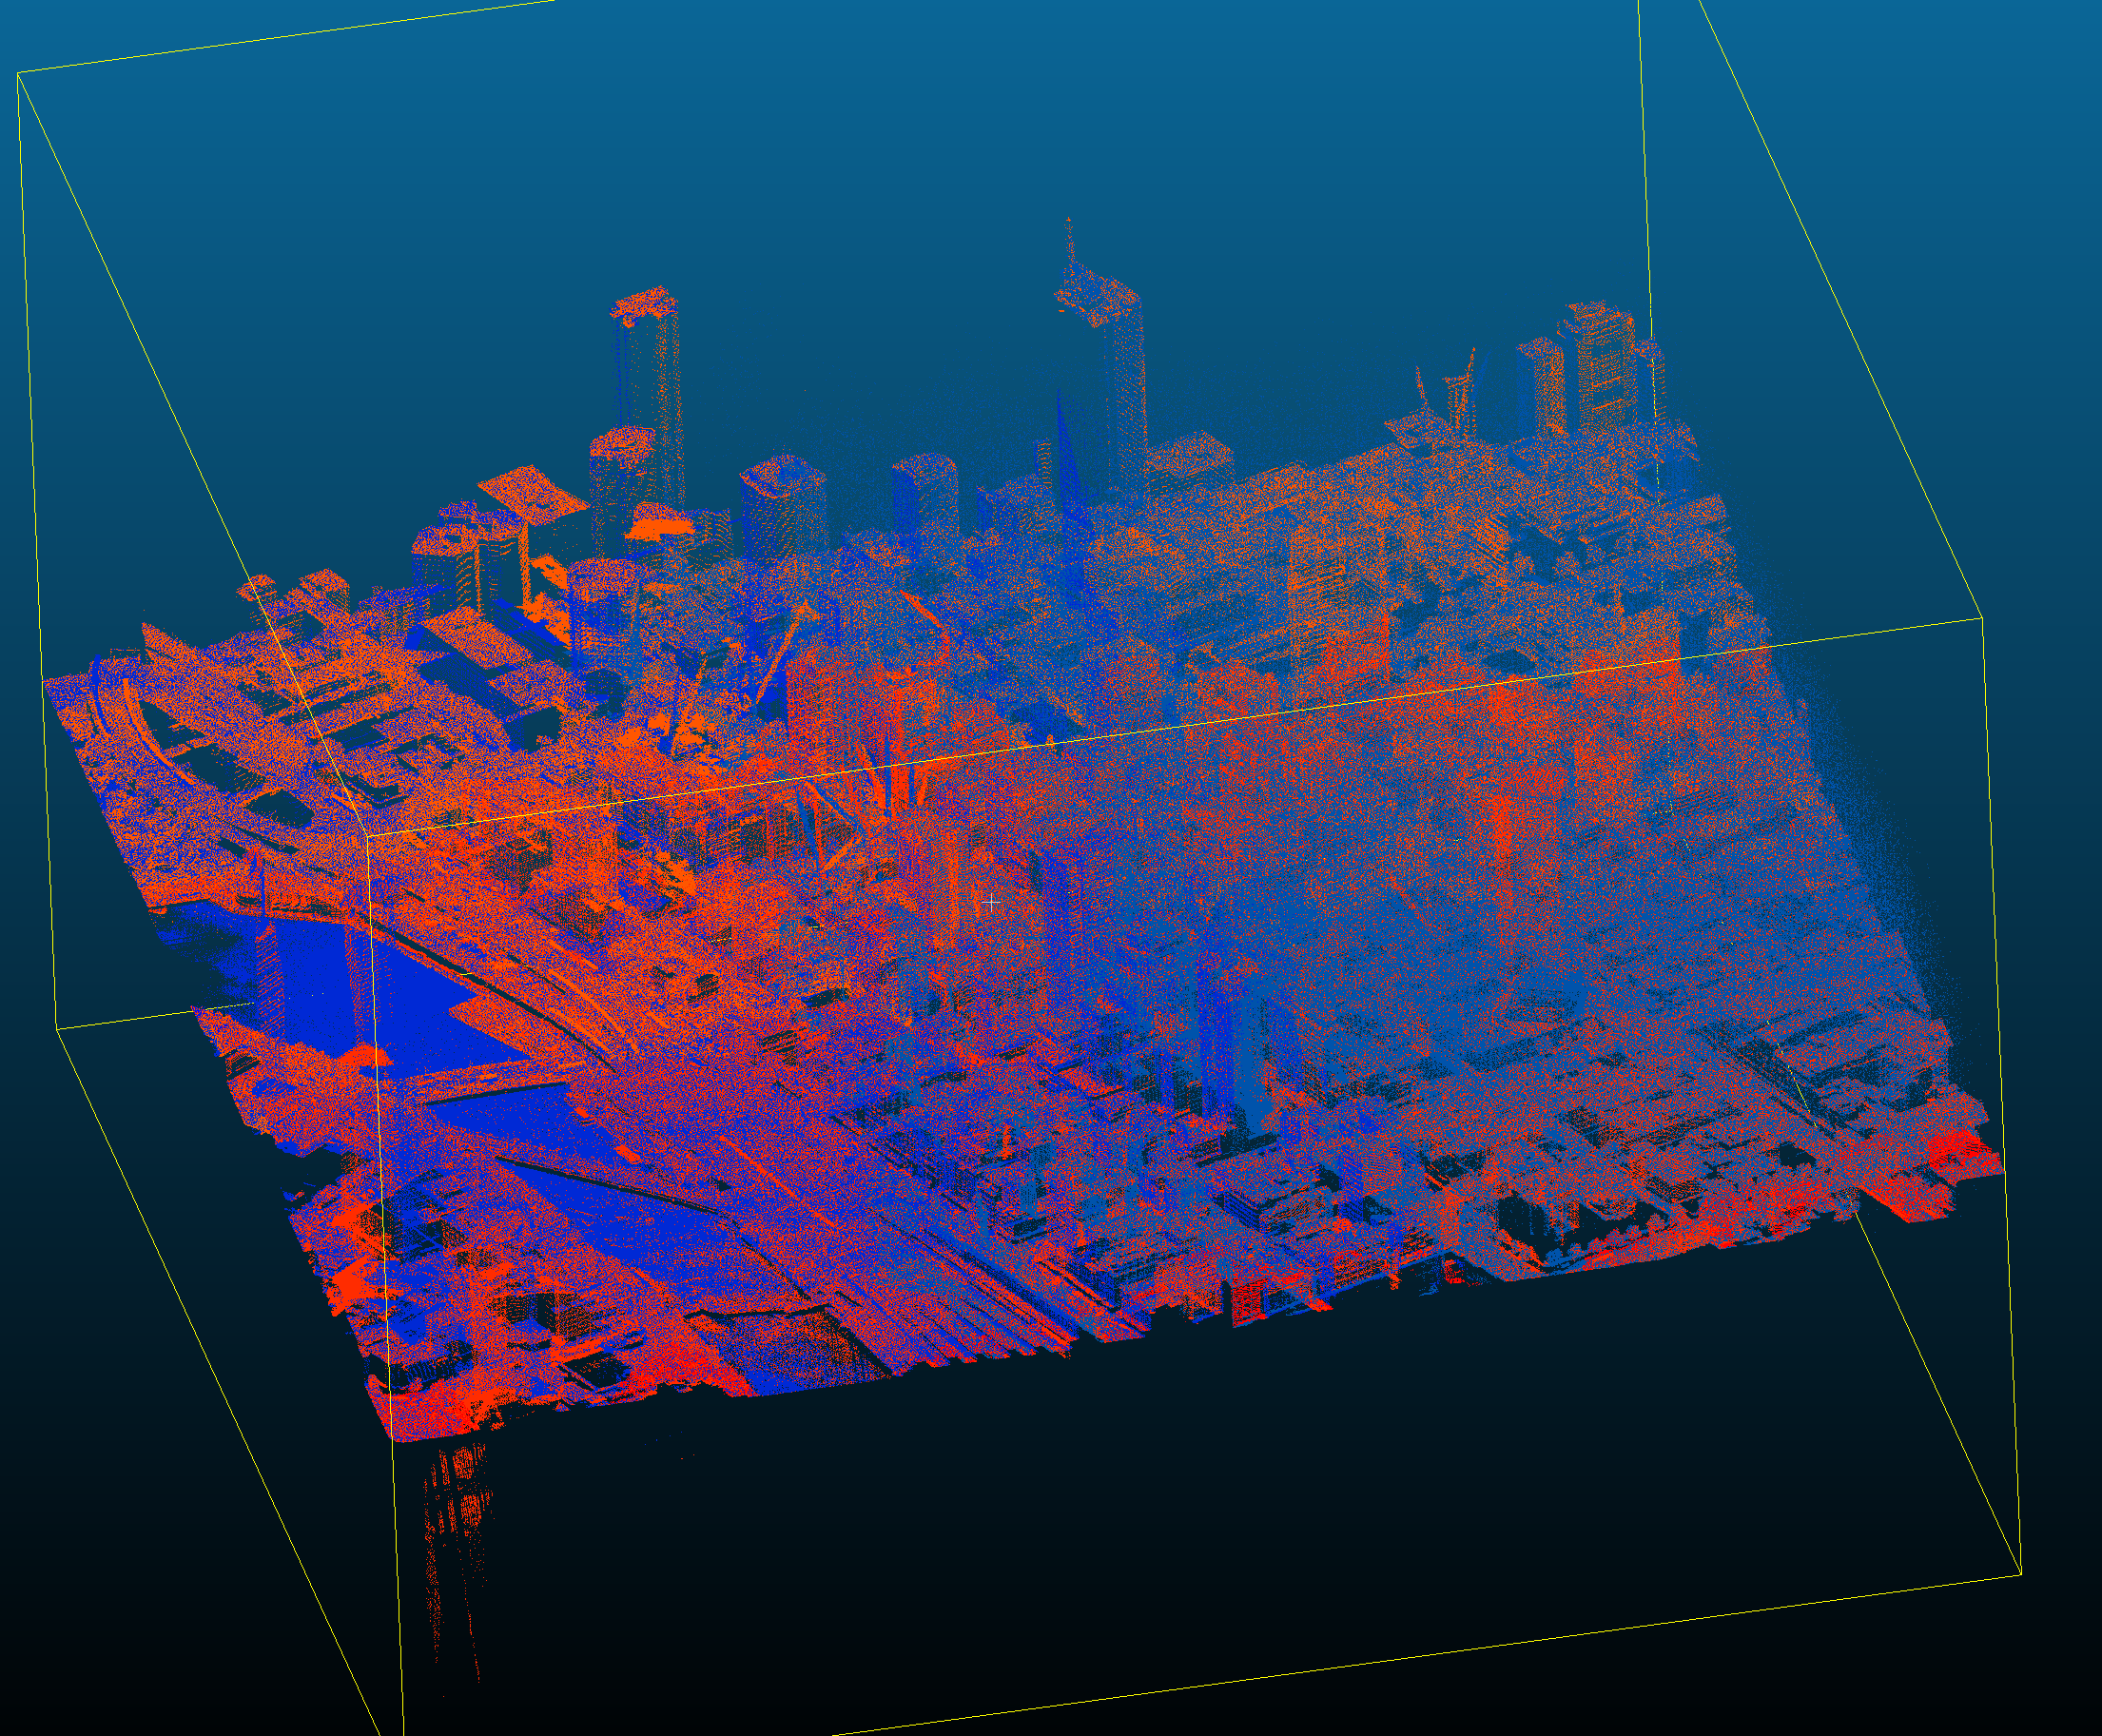
Figure 1 – Original las dataset
Step 3 Isolate problematic portions of the dataset
Using the Filter points by value tool, we were able to split the dataset apart and clean up only the erroneous portion of the dataset whilst maintaining the density of the correct portion of the dataset.

Figure 2 – Filter points by value tool
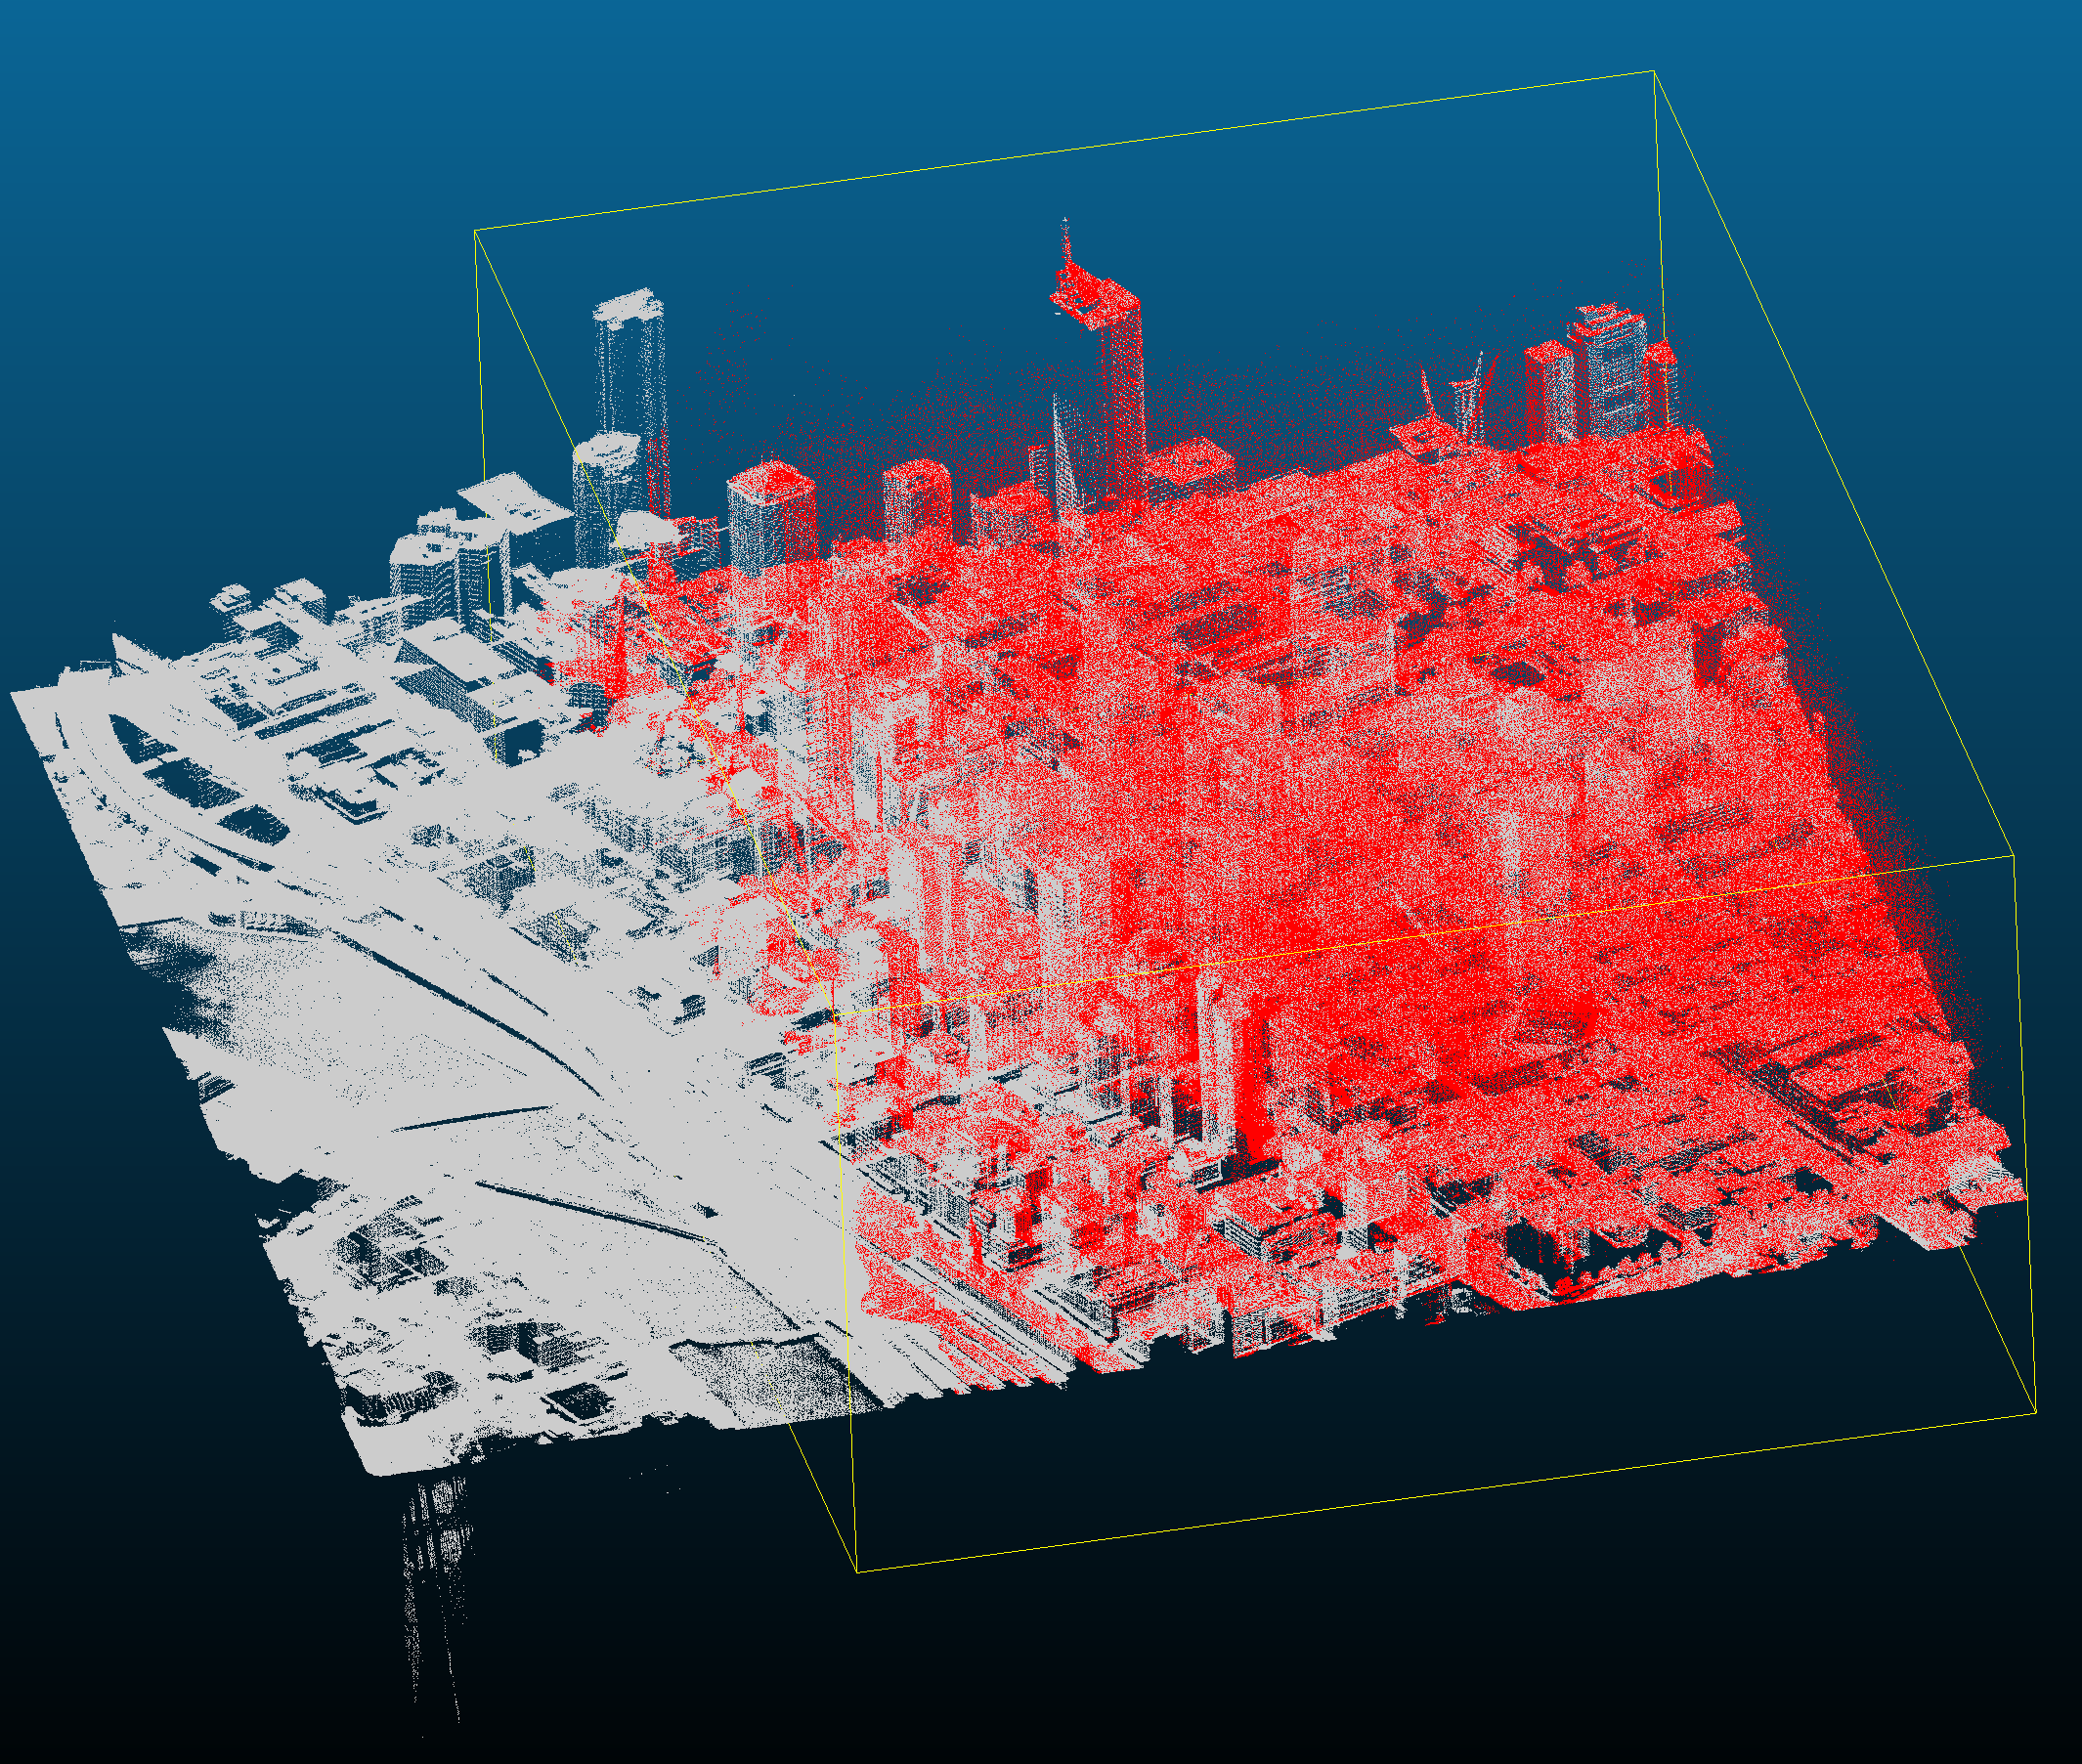
Figure 3 – las dataset symbolised to show the problematic data
Step 4 Clean up the las file using Statistical Outlier Removal tool
The Statistical Outlier Removal tool removes points from the cloud that fall outside the standard deviation you specify. (1 being 68%, 2 being 95% and 3 being 99.7%)

Figure 4 – Statistical Outlier Removal Tool circled in red
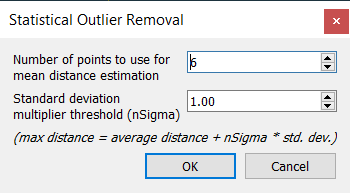
Figure 5 – Default options for Statistical Outlier Removal tool
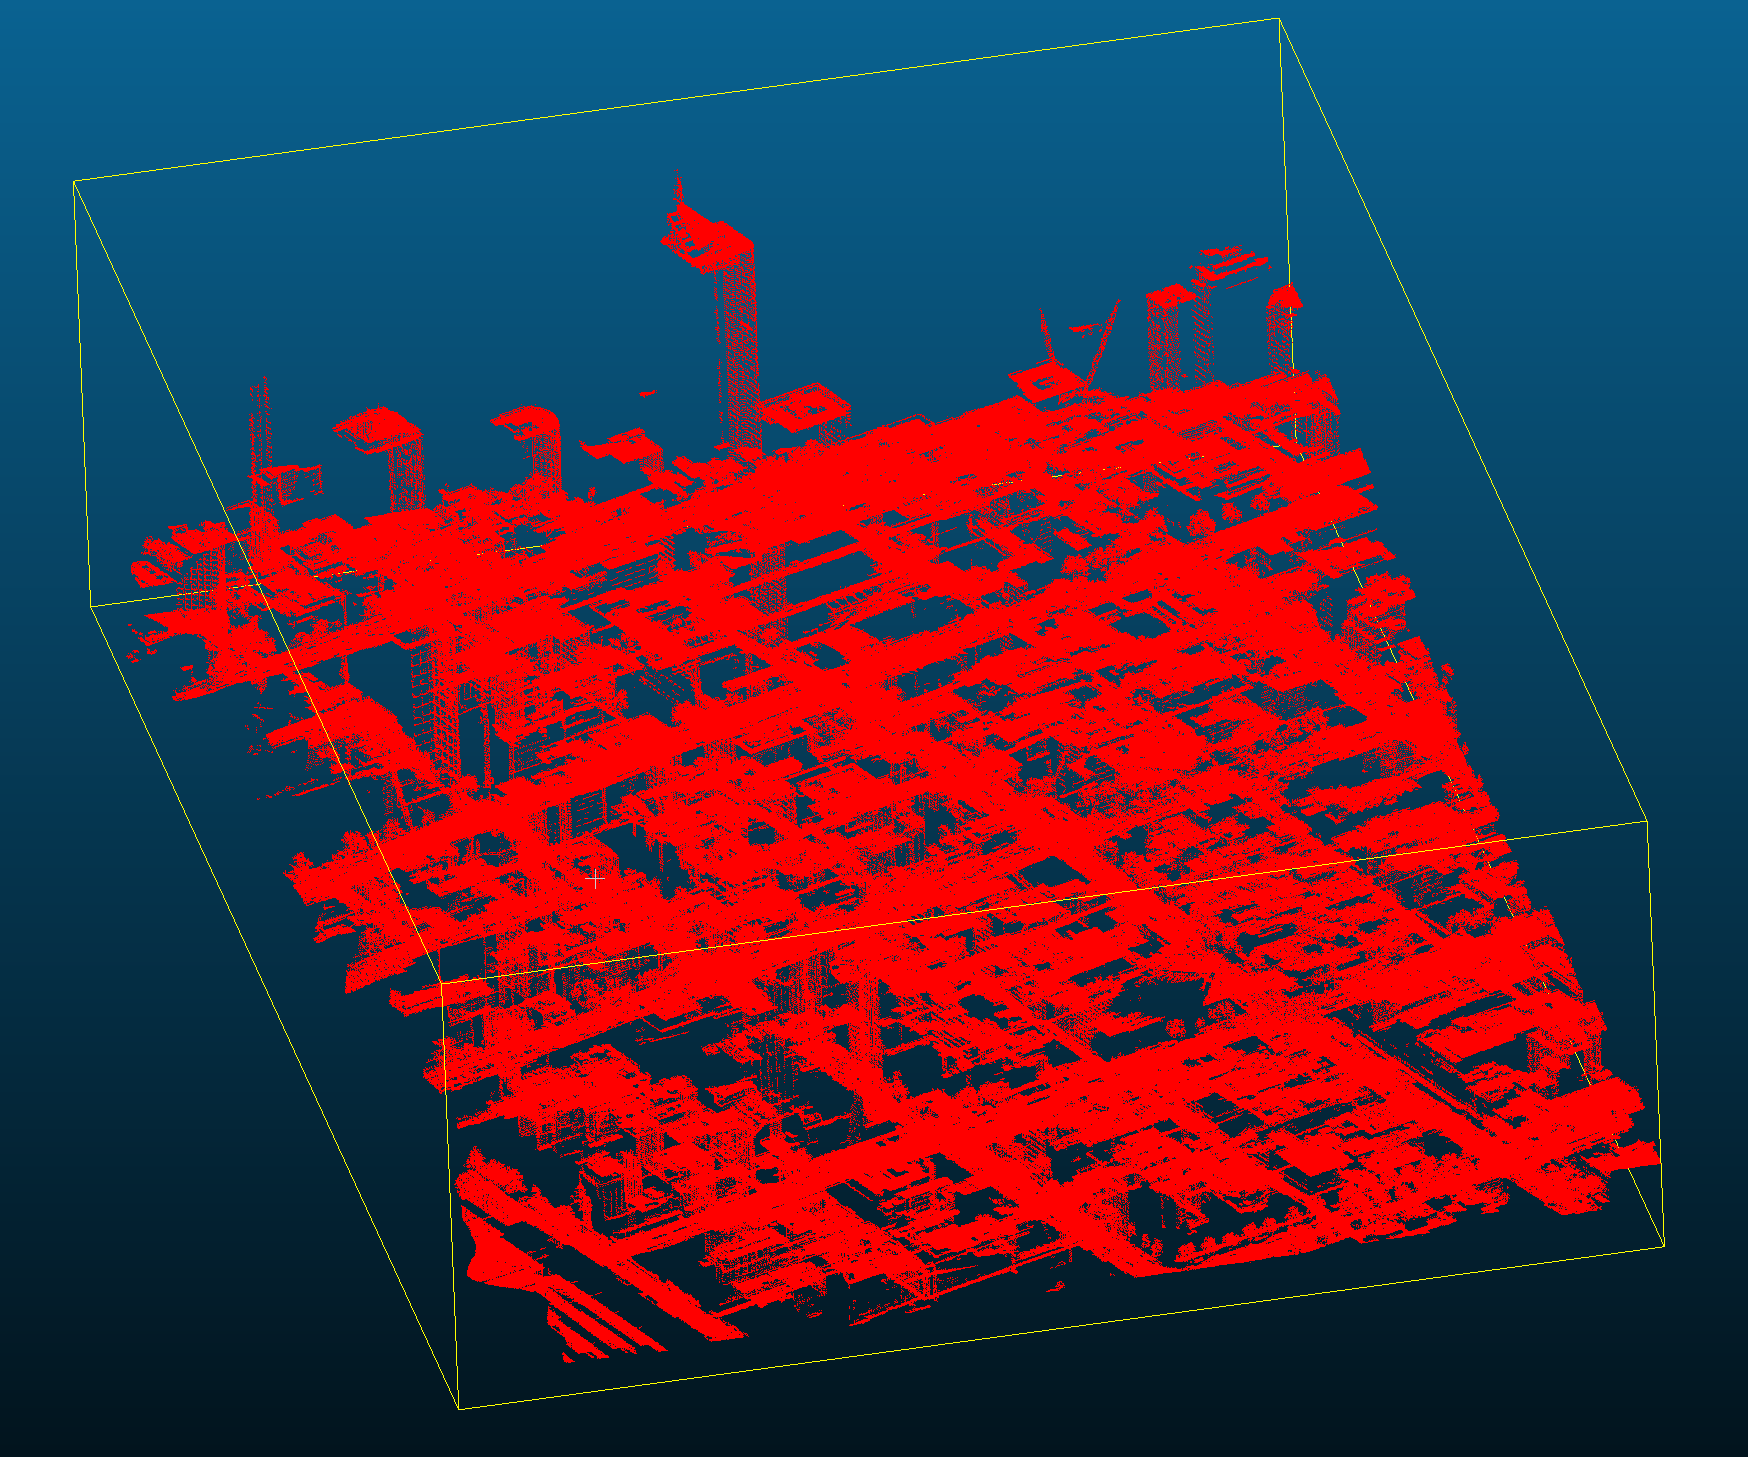
Figure 6 – Resulting problematic data isolated and cleaned with the Statistical Outlier Removal tool
Step 5 Merge the cleaned dataset portion back with the unaltered correct portion
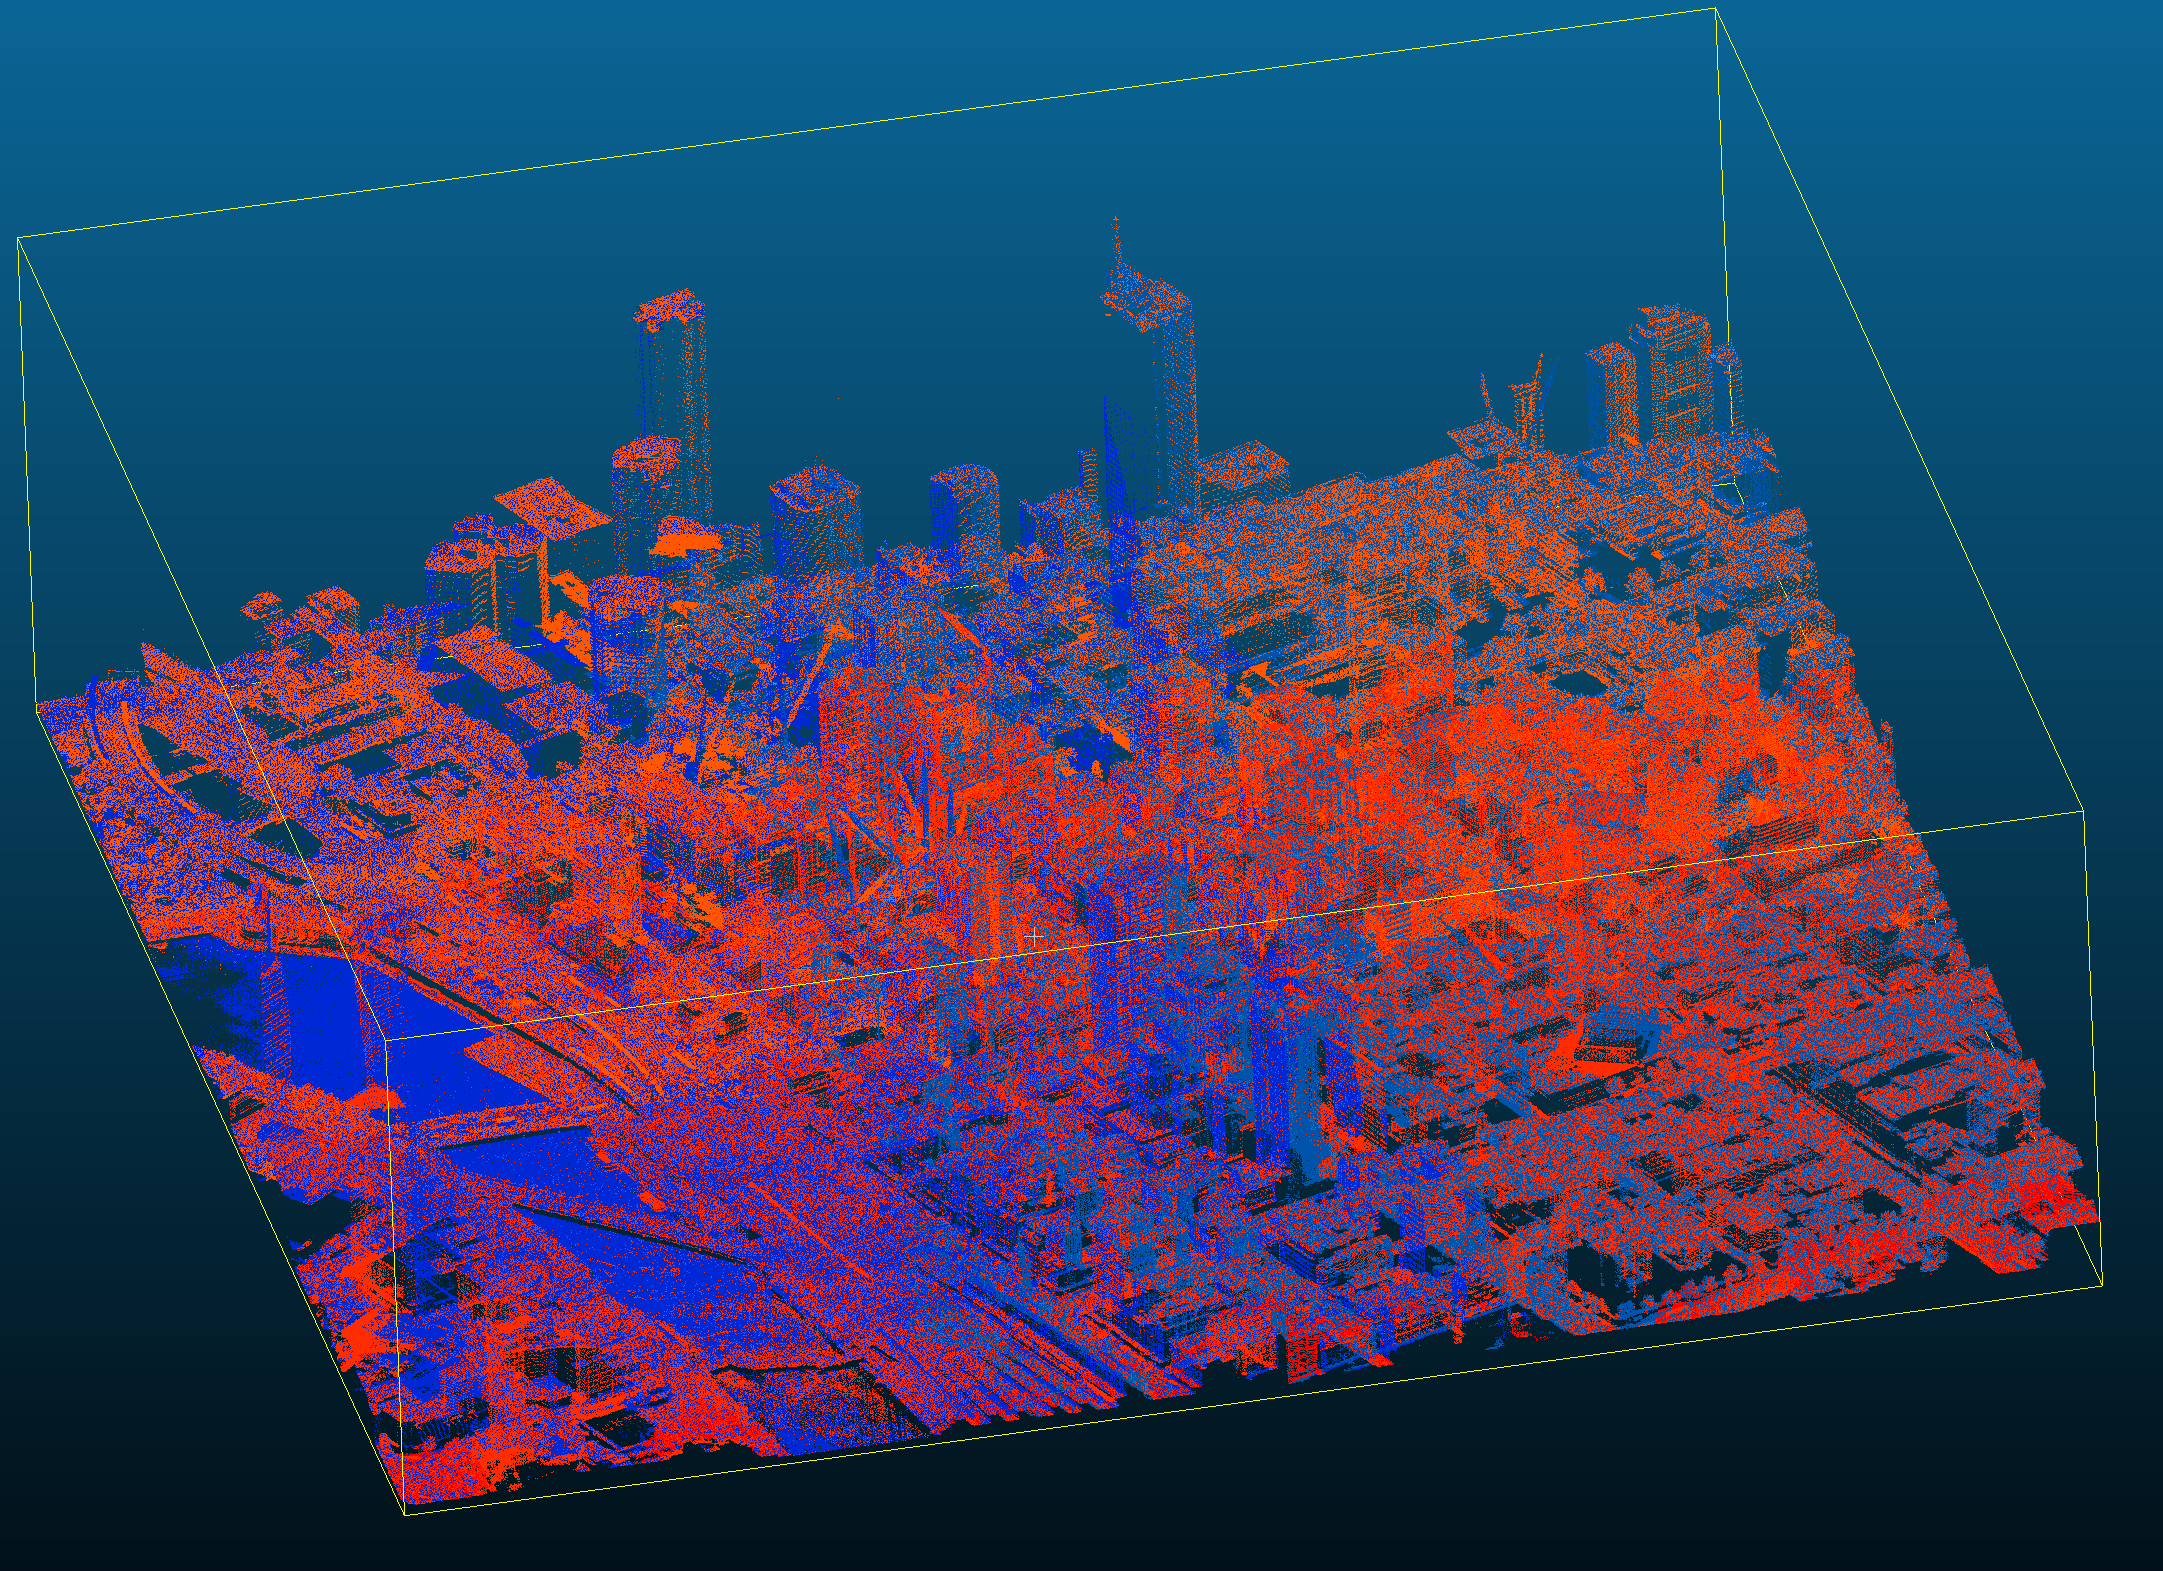
Figure 7 – Final cleaned las dataset

Figure 8 – Merge multiple point clouds tool
Merge the two filtered las clouds back together with the Merge Multiple Clouds tool. Sometimes there may be some erroneous points that still exist. These can be manually removed with the segment tool.

Figure 9 – The Segment tool
Step 6 Re-import the new cleaned dataset into Arc Pro
Now that the data is cleaned, it can be re-imported back into ArcPro. Overall, this process reduced the original point cloud from 12,834,669 points down to 12,313,100 points (a reduction of 521,569 points which is only 4% of the total point count). The initial height range for the dataset was showing a low of -239m and a maximum height of 421m, whilst the cleaned dataset has a range of -4m to 307m. Sometimes ArcPro may say that a spatial reference does not exists when the las file has been exported from cloud compare. This can be easily fixed by defining the projection in ArcPro.
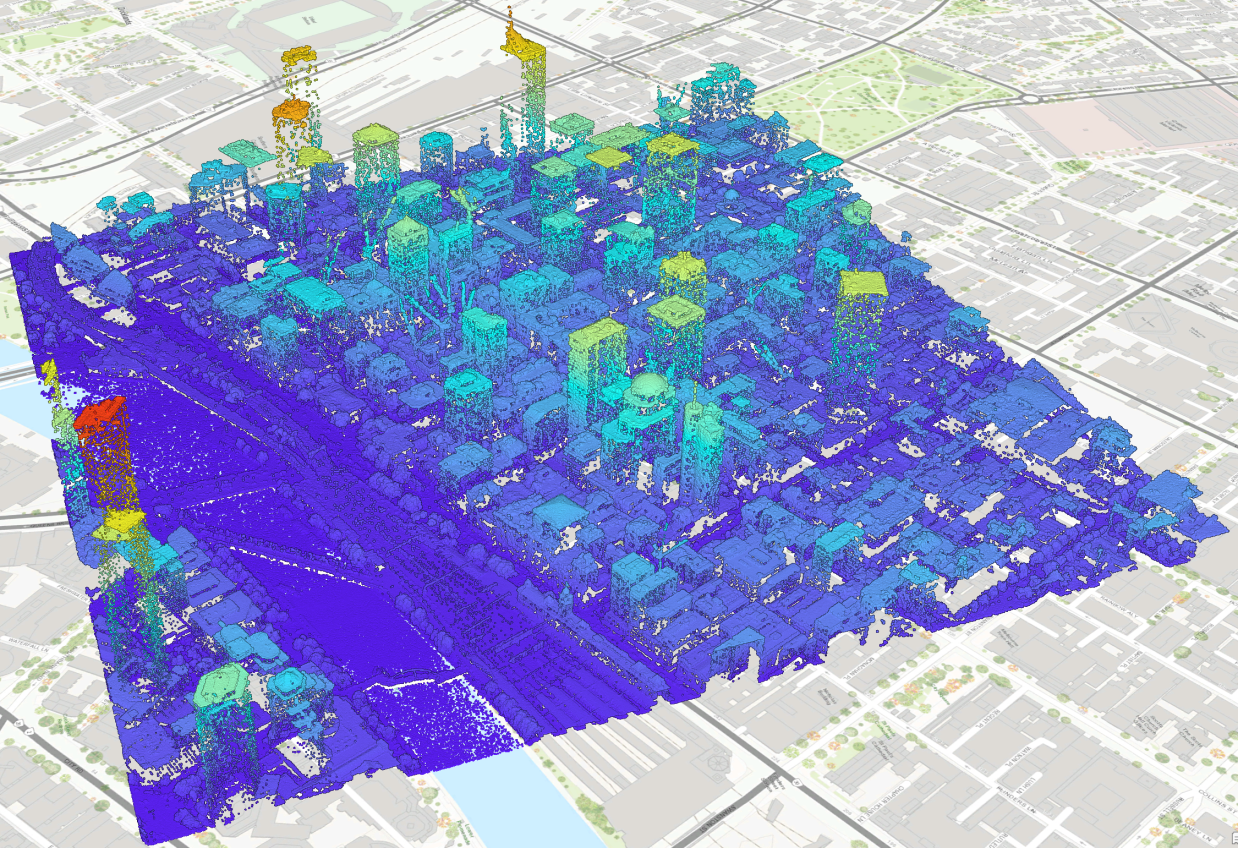
Figure 10 – Cleaned las data re-imported to ArcPro
Be wary, although your computer was capable of rendering the point cloud in Cloud Compare, don’t assume it can do it as well in ArcPro. ArcPro does utilize some extra visualizing functionality which can tax some lower specification computer builds.
Step 7 Symbolize and explore the data
Now that you have the las data in ArcPro, you can explore it through various standard symbology types. The default symbology in Step 5 above shows the height value of the point cloud as points. Other options include drawing the data as contours, edges and as a surface (which has the option of elevation, slope and aspect). Have a play around with the different symbology styles just to make sure that the data has been correctly cleaned. This is best checked when using the point based symbology and viewing it in 3D to pan and tilt around the scene.
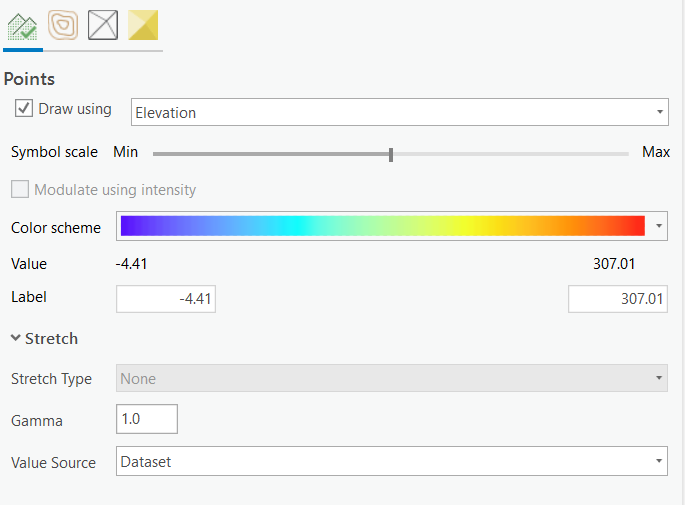
Figure 11 – Symbology options for point clouds
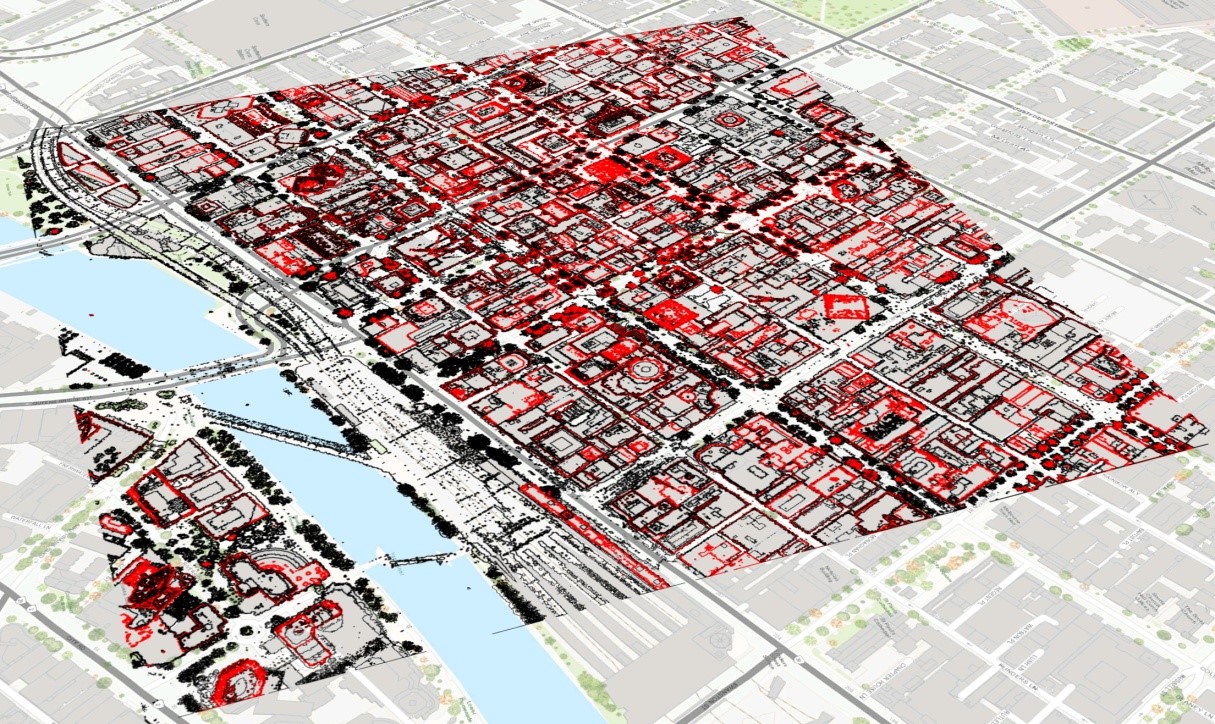
Figure 12 – las data drawn as contours
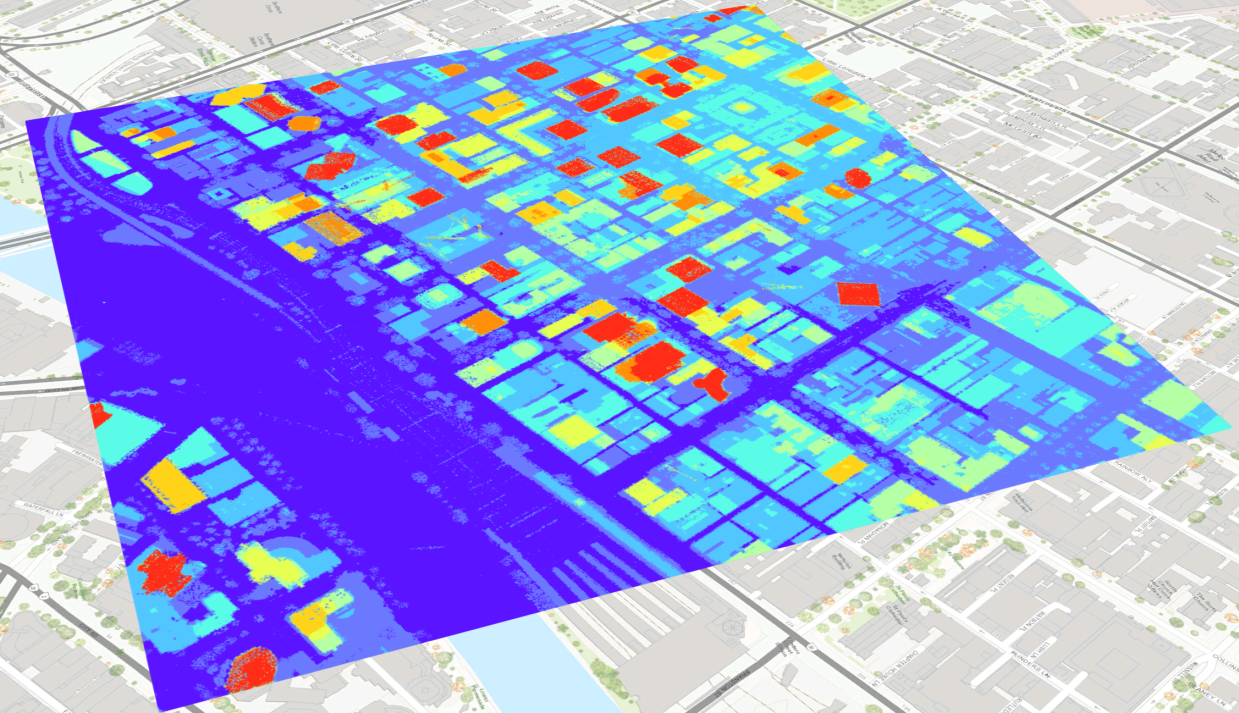
Figure 13 – las data drawn as a surface
Final notes on performance
Remember that exploring 3D data like this can be quite taxing on your system! Be gentle with what you ask your computer to do and if you find it is starting to lag or freeze up, consider implementing a few of the following:
- Reduce the display limit for the number of points (you don’t always need all 12.3 million)
- Alter the Display settings in ArcPros Options
- Antialiasing mode = None
- Rendering Quality = Low
- Sometimes the cache can build up substantially. It is not uncommon for it to get up to greater than 20Gb. Clearing this can give a quick speed boost to the rendering.
- Use a smaller clip of data.
At the end of the day, nothing beats having adequate hardware. When it comes to 3D data, a dedicated graphics card is a must and having substantial amounts of RAM is also beneficial. The system specifications used for this rendering are displayed at the bottom of this blog. We are pushing the processing to the limit on this one so you don’t have to!
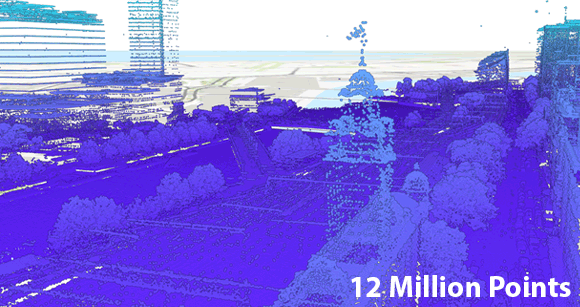
Figure 14 – Example of how point limit affects the view detail
| System Build | |
| CPU | AMD Ryzen 9 3900X 12-Core 3.79GHz |
| RAM | 64Gb |
| Operating Drive | Samsung 840 EVO 250Gb SSD |
| GPU | Nvidia RTX2080 Super 8Gb |
| OS |
Windows 10 64bit |
- Case Study: GIS Service Plan - July 24, 2024
- Climate Change Statement - November 9, 2021
- Welcome Ryanne Firme – Digital Cadastre Modernisation Team - May 21, 2021